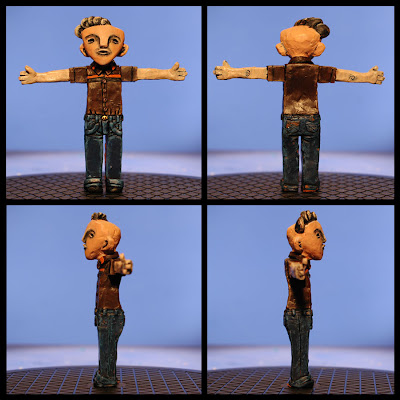
 Finalizing the design of the character was only the beginning of the process of getting the characters into the game. After Erik had built and painted the finished clay figurine, the characters had to be processed through quite an array of steps before you could actually interact with them.
In order to transpose the nice hand painted texture onto a 3D mesh, we photographed each character from a number of different angles.
From these reference pictures our modeler, Anders Dahlström, created a 3D approximation of the figurine, using a composite of the various photographs as a texture map to wrap around the mesh.
With a complete model, he could then start animating the character. Since we largely plan on distributing the game online, file size budgets forced us to be quite restrictive when it came to animation. Basically each character had a still pose, a walk cycle (double step), an interaction animation and a pick up animation. That's it. These then had to be rendered from 5-8 different camera angles depending on how symmetrical the character design was.
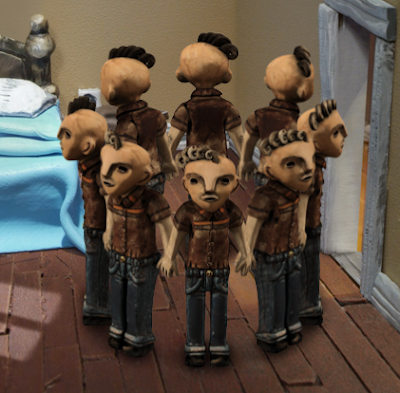 Victor's little funky brush hair made him completely asymmetrical and therefore we had to render him from 8 different angles, but for most other characters 5 proved sufficient.
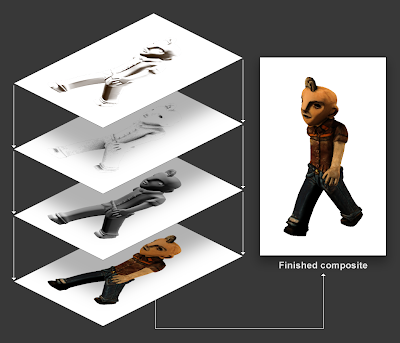 Since the characters have to travel through a large number of different lighting conditions, we had to experiment quite a lot with how to blend the different render passes. In the end we settled on the four layers you can see above, but starting out we had a few more. They're each blended with the underlying layer in unique ways, and finding the right way to mix them required a lot of trial and error.
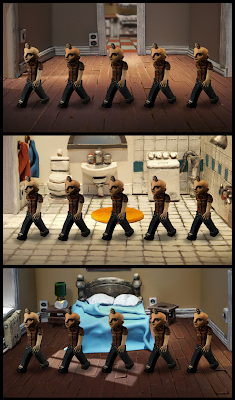 To help us out with this, we posed the different variations in a number of different lighting conditions to see which one worked best generally. Just glancing at them they look very similar, but if you study them carefully you start to notice subtle differences in how they're lit.
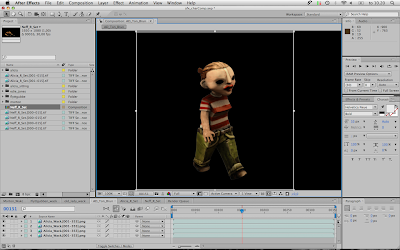 Compositing them together required a combination of After Effects work and Photoshop. We used After Effects to blend the different layers and crop the images as tightly as possible.
Sometimes the rendering left some edge artifacts, but that could easily be removed with a Photoshop batch process that also reduced the characters to their final size.
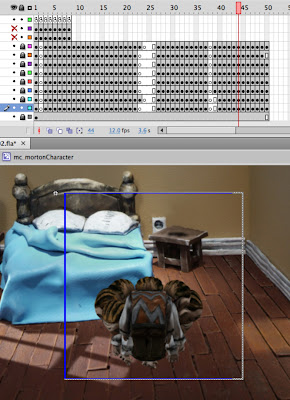 Once all the rendering work had been completed we moved on to the exceedingly boring phase of editing all the 300 separate images (for each character), before chopping them up into the 8x4 animation slots we use in the game. But once all this was done and the actor system took control, seeing them walk around and interact in the game was a pure joy and we soon forgot how trite and laborious the journey to get them this far had been.
Cheers,
- a
PS: I'm not entirely up to speed with 3D lingua franca. If you spot an error in the post, don't hesitate to point it out in a comment and I'll stare at it sternly until it goes away.

This game looks absolutely brilliant and the demo made me really excited to see the final project. You have this incredibly expressive style despite it's surrealistic roots. You've made a fan out of me :)
ReplyDeleteI saw that you exposed a glimse of your Flash structure in one of the screenshots and I was wondering if you would care to share more of it. As an aspiring game developer with a taste for adventure games I'm struggling with how to handle modifying objects during gameplay, like how you created the holes in the beach and added the fireplace.
Care to toss me any hints*?
* Any secrecy in terms of trade secrets is completely understandable ;)
Sure Michael!
ReplyDeleteI'll try to go into the Flash side of things in an upcomming post.
Thanks for the request, it's always appreciated!
This is a great postt thanks
ReplyDelete